Get Your Listings First on Google
Introduction
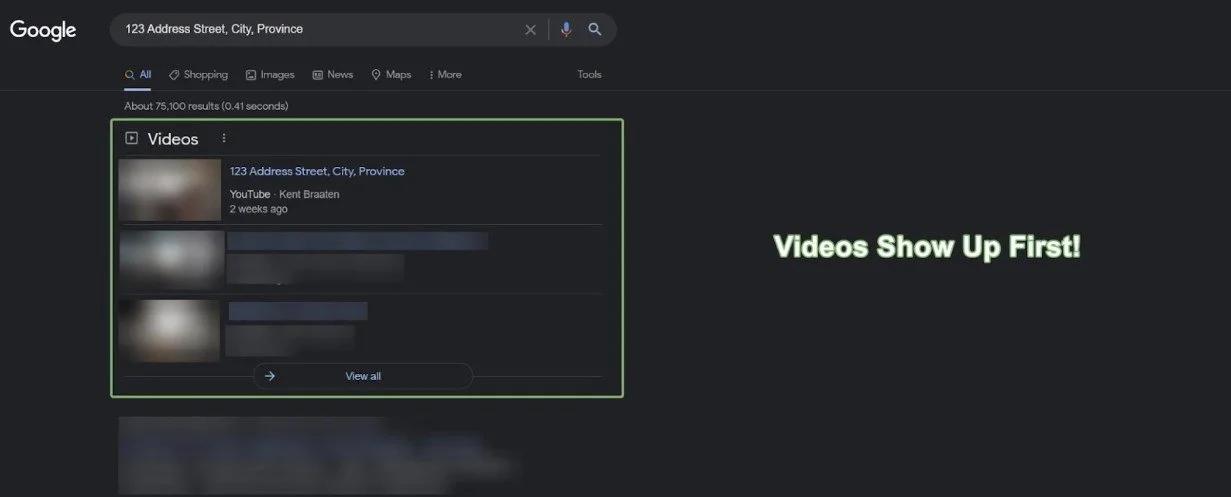
Getting to Google first can dramatically affect your ranking on a listing. Clients are much more likely to click your link when you are the top result on Google, increasing your relevance in future searches.
Getting your listing to Google first takes some sweat equity that will pay off with leads and overall increased ranking on your site. The key to this process is to take advantage of the time between when a listing is secured and when the listing is made public on MLS. Consult your board regulations for details on this time frame and specific rules around exclusive listings.
Methods
There are many methods you can use to get your listing to show up first on Google. This guide will walk you through how to…
Upload a YouTube video showcasing the listing
Make a Google My Business post that links back to your website
Method 1: Upload A Custom YouTube Video
Creating a custom YouTube video can be a lot of work, but it’s worth the effort when you consider that Google owns YouTube, and Google loves to promote its own platforms. So by creating a custom YouTube video for your listing, you essentially get to skip the line and show up first on Google’s search results!
Step 1: Create a Video
Visit the listing’s location and take quick video clips/pictures of the property
Use a video editing app to create a simple slideshow of the video clips/pictures you took
Save the slideshow to a video file
Step 2: Upload the video to YouTube
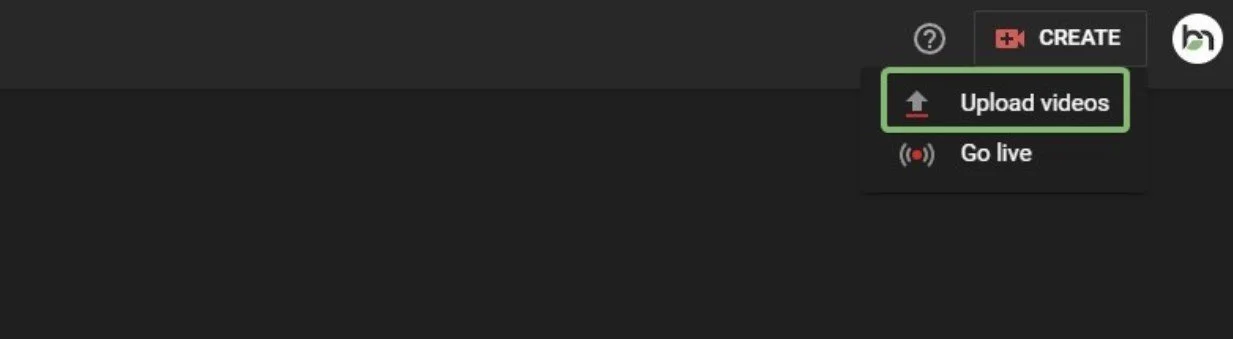
Go to studio.youtube.com and log into your Google account (if you need to). This is your YouTube channel’s dashboard where you upload videos
Click the “Create” button in the top right, and choose “Upload videos”
Drag the video into the pop-up window, or click the “Select Files” button to open your file manager
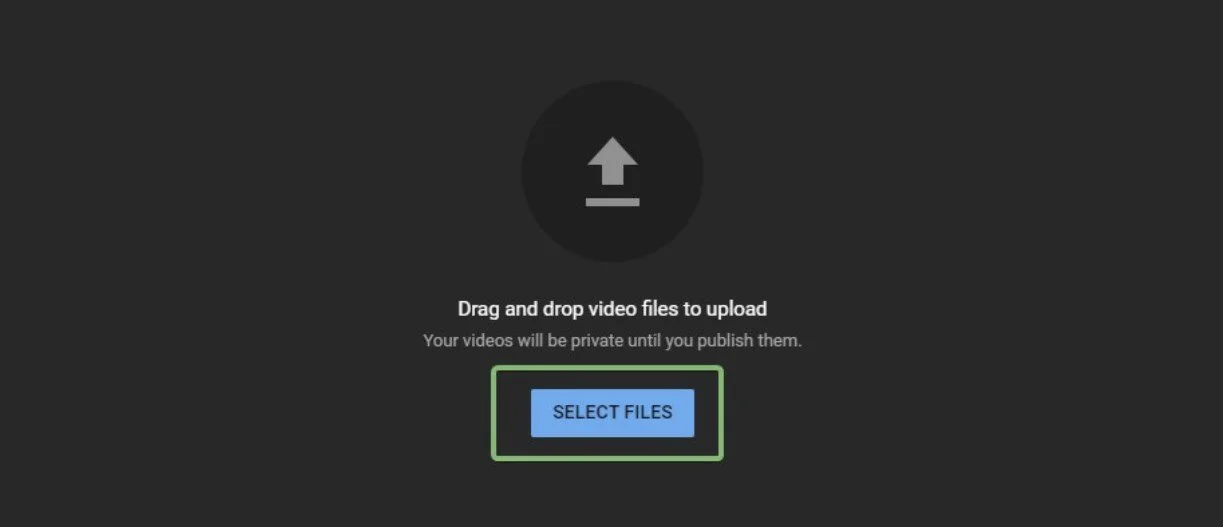
After you select the video you want to share, YouTube will automatically start uploading it. In the meantime, we can edit the video’s details.
Step 3: Create the Perfect Title & Description
This step is very important. The information you put in your title/description will be what Google uses to determine where to put your video in the search results.

Title
The title can simply be the address for the property you’re promoting.
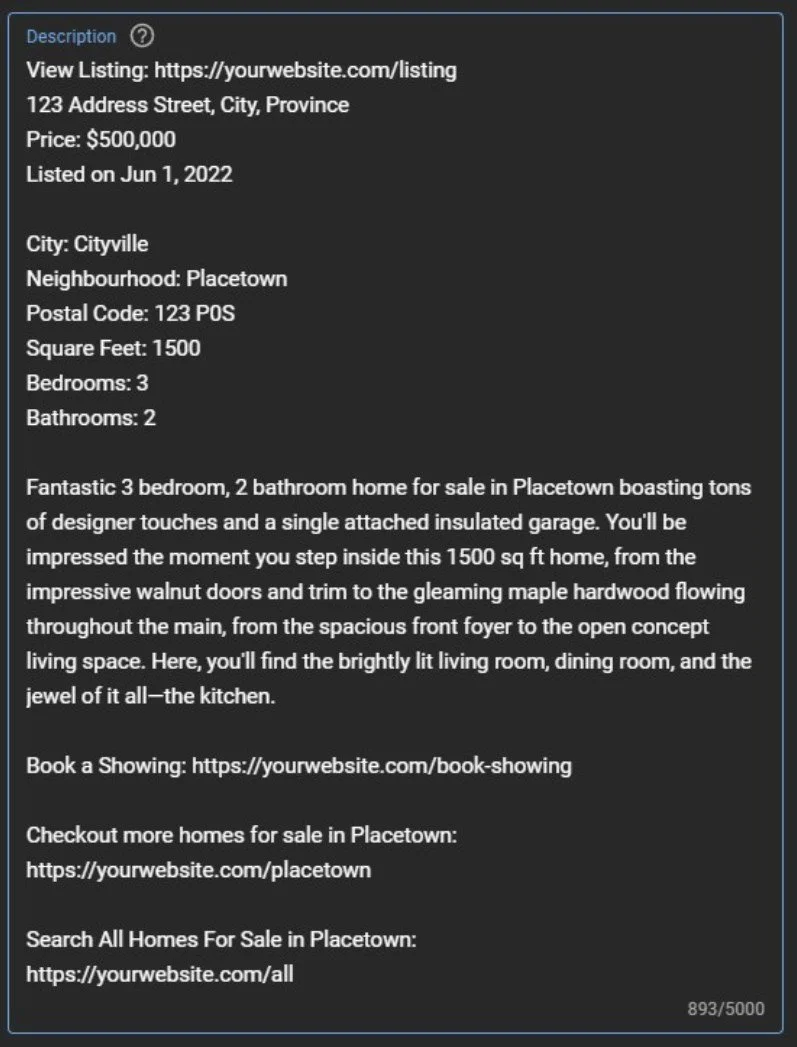
Description
The description is where the detailed info can go.
Here’s a good template to follow:
[Link to the listing on your website]
[Property Address]
[Property Price]
[Listed Date]
[City]
[Neighbourhood]
[Postal Code]
[Square Feet]
[Number of Bedrooms]
[Number of Bathrooms]
[Listing Description]
[Link to Book a Showing]
[1-3 Links to similar content]
Note: To get the link to your listing, go to your website and find the property, then copy the link in your search bar. That is your listing link.
Once you’re happy with your title and description, complete any remaining fields and keep clicking “next” in the bottom right until it gives you the option to “save” Note: Make sure to mark your video as “Public” so everyone can see it!
Method 2: Create a Google My Business Post
Whenever you type a business name into Google search and see the business pop up on the right side of the screen, that’s “Google My Business”.
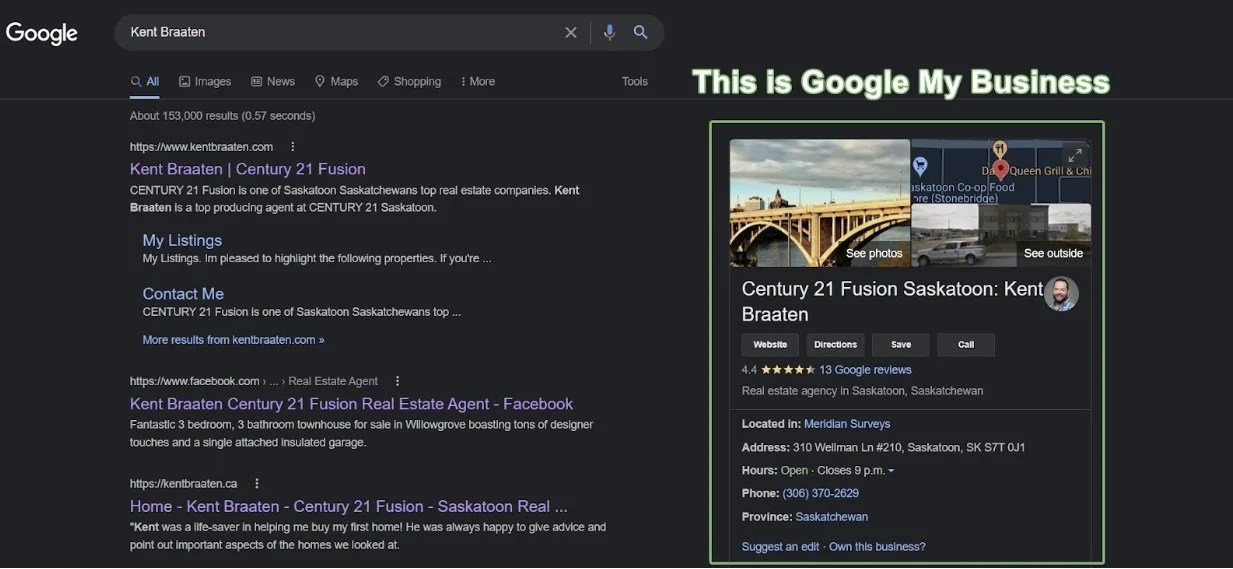
Did you know that you can post about your listings directly on your business profile, so they show up in the search results? Here’s how to do it:
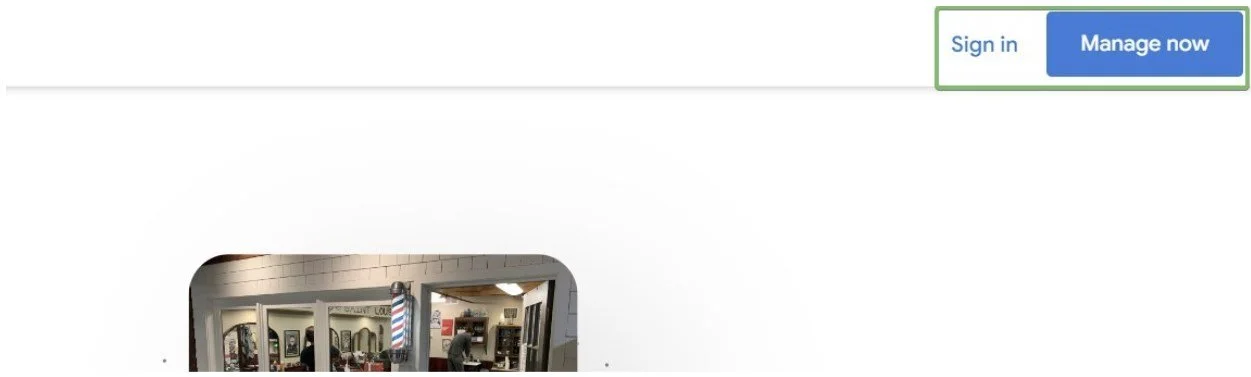
Step 1: Log Into Google My Business
Go to business.google.com and click “Manage now” (or “Sign in” if you have a profile already). If you don’t have a profile yet, you’ll need to create one.
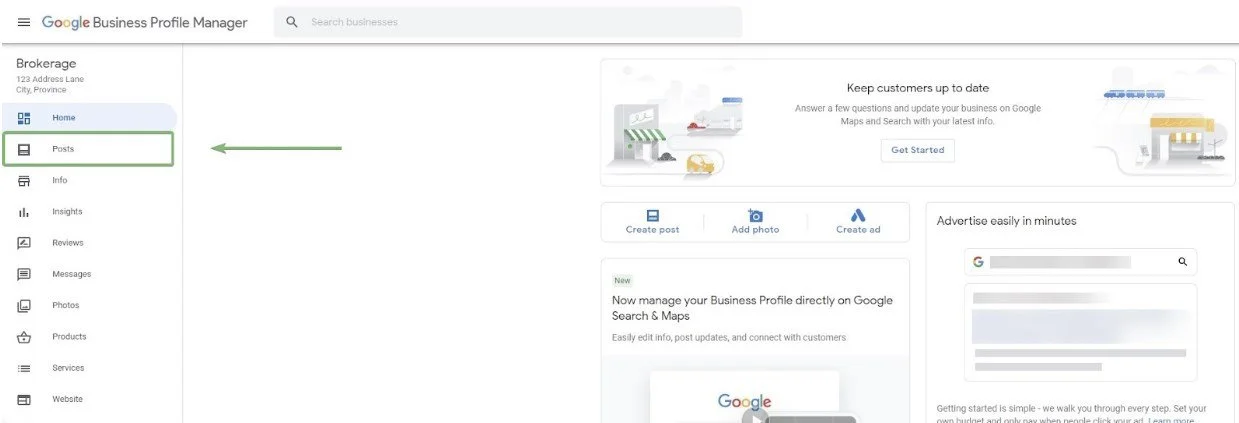
Step 2: Create Your Post
Once you’re in your Business Profile Manager, click on “Posts” on the left sidebar
Then click the blue post icon in the bottom right.
Choose the type of post that you want (for most cases, choose “What’s New”)
Fill in the post content
For the media, use a photo of the property you’re promoting (or multiple photos if you have them)
For the post, it’s best to keep it simple. You can include the address and a short description.
For the button, choose “Learn More” (or whichever option makes the most sense in your case), and use your listing link
Note: To get the link to your listing, go to your website and find the property, then copy the link in your search bar. That is your listing link.
Click Publish when you’re ready!
The post will now show up on Search and Maps when people look for your business.

What Else?
There are many more ways to get your listing seen. Here are a few more options:
Create an exclusive listing on your website by manually entering the listing
Facebook Post - with a link back to the listing on the website
Create a Facebook “Just Listed” Paid ad
Create a Facebook Neighbourhood Paid ad
Create a post on Instagram, Twitter, and LinkedIn
-
Content Production
- Jan 10, 2024 How to Use The Featured Listings Widget From Benchmetrics
- Feb 6, 2023 How to Add The Listings Catalog to Your Website
- Oct 28, 2022 Page Building Guides
- Oct 26, 2022 Internal Page Design 4 Walkthrough Guide
- Oct 26, 2022 Internal Page Design 3 Walkthrough Guide
- Oct 26, 2022 Internal Page Design 2 Walkthrough Guide
- Oct 26, 2022 Internal Page Design 1 Walkthrough Guide
- Oct 26, 2022 How to Create and Use Custom Searches
- Oct 20, 2022 How to Add Videos to Your Real Estate Website
- Sep 7, 2022 Content Writing 101
- Jul 13, 2022 Get Your Listings First on Google
- Jul 12, 2022 Real Estate Video Hardware Recommendations
-
Getting Started
- Oct 28, 2022 Page Building Guides
- Oct 5, 2022 CREA DDF Feed Setup Tutorial
- Jul 13, 2022 How To Grant Access To Your Website
- Jul 13, 2022 How To Access Your Agent’s Websites
- Jul 13, 2022 How to Add Benchmetrics to Your Facebook Page
-
Optimization
- Jul 15, 2022 How to Hide Pages on Your Website
- Jul 13, 2022 Optimize Your Website Navigation
-
SEO
- Oct 20, 2022 How to Add Videos to Your Real Estate Website
- Sep 7, 2022 Content Writing 101
- Jul 15, 2022 Get a Custom Domain for Your Website
- Jul 14, 2022 How To Optimize Your Pages For SEO
- Jul 13, 2022 Get Your Listings First on Google
-
Social Media
- Dec 20, 2022 How to Install Facebook Messenger on your Real Estate Website
- Jul 14, 2022 Put Your Listings on Facebook Marketplace
- Jul 13, 2022 Facebook Messenger And Auto Responses Guide